It's time for yet another "We Knead to Bake" project, but with a small change. Just for this month, Aparna let us choose to bake any bread of our choice. Coincidentally, I had this book "The Bread Baker's Apprentice" by the ever so famous "baking guru" Peter Reinhart lent from our local library and had umpteen different options in front of me to choose. Just like a kid in a candy store, I was completely lost, over-whelmed with the varied options that the book had to offer, right from stiff breads like lavash to rustic breads like ciabatta and anything & everything in-between. The book has a lot of information from different types of flour to detailed recipes, very well laid out, thorough and precise, all at the same time. The book clearly shows the experience and wisdom of the author in the art of bread making. It is a baking tutorial, recipe collection, and also a bedtime book, for baking enthusiasts like me!!
Long story short, I decided to start with the easiest one, Lavash Crackers which is a stiff (50 - 57% hydration and that means easier handling of the dough), and a direct bread (without the need for pre-fermentation)!
Long story short, I decided to start with the easiest one, Lavash Crackers which is a stiff (50 - 57% hydration and that means easier handling of the dough), and a direct bread (without the need for pre-fermentation)!
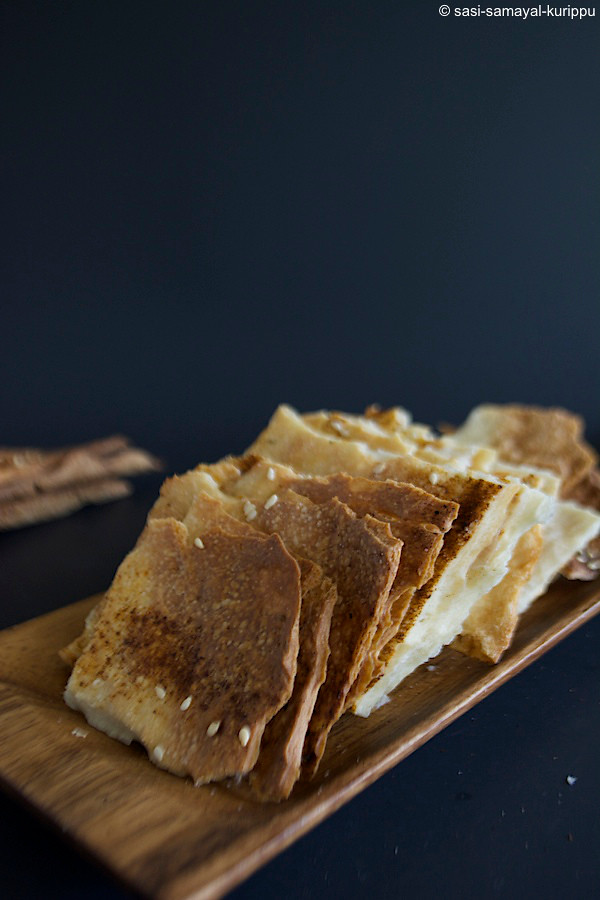
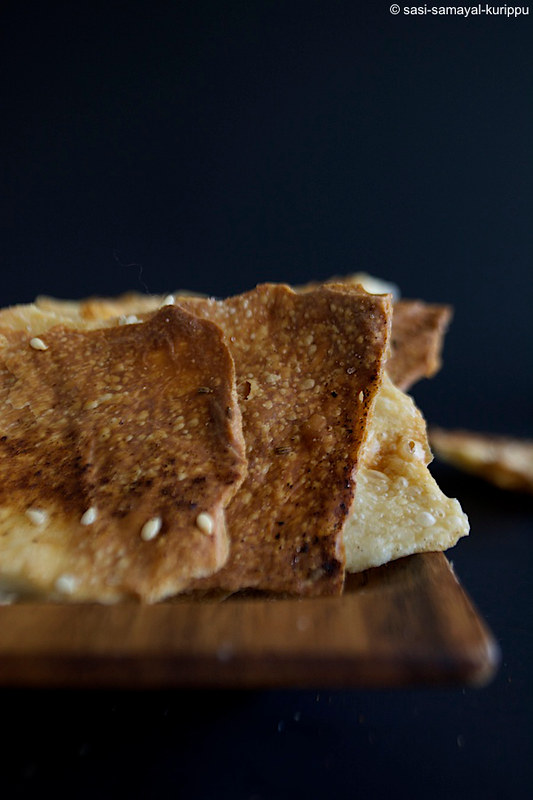
Lavash is a thin flatbread of Armenian origin, but also has Iranian roots and is now eaten throughout the middle east and around the world. It is similar to many other Middle Eastern (like pita) and North African (like Injera). The main difference between these breads is either how thick (or) thin the dough is rolled out, or the type of oven in which they are baked. However, the key to crisp lavash is to roll-out the dough paper-thin. The sheets can be cut into crackers in advance or snapped into shards after baking.
Thin & crisp lavash is becoming one of the most popular variations that can be served with hummus (or) guacamole (or) any other dip of your choice. The soft lavash can be used to roll up sandwich - simply spread the dressing, layer with your favorite vegetables and roll. If you can bake these lavash bread in advance, putting up a filling wholesome snack (or) meal is a no biggie!!


Basic Info
Complexity - Medium
Prep time - 2 hrs (includes mixing, fermentation, shaping & panning)
Cook time - 15-20 mins for baking
Serves - 2 thin sheets of size 15x10 inches
Adapted from the book "The Bread Baker's Apprentice" by Peter Reinhart
This recipe is being "Yeast-spotted"!!
Adapted from the book "The Bread Baker's Apprentice" by Peter Reinhart
This recipe is being "Yeast-spotted"!!
Ingredients
1.5 cups unbleached bread flour
1/2 tsp salt
1/2 tsp instant yeast (OR) 3/4 tsp dry active yeast*
1 tbsp honey
1 tbsp vegetable oil
1/3 to 1/2 cup water
Sesame seeds, paprika, cumin seeds, carom seeds/ajwain, kosher salt for topping.
Method
In a mixing bowl, stir together the flour, instant yeast, salt, honey, oil and just enough water to bring everything together into a ball. You may not need the full 1/2 cup water, but be prepared to use it all if needed.
Sprinkle some flour on the counter and transfer the dough to the counter. Knead for about 10 mins (or) until the ingredients are evenly distributed. The dough should pass the windowpane test**. The dough should be firm, satiny to the touch and supple enough to stretch when pulled.
Ferment at room temperature (or inside the oven with the oven lights on) for 90 mins (or) until the dough doubles in size. Divide the dough into 2 halves.
Mist the counter lightly with oil and transfer the dough to the counter. Press the dough into a square with your hand and dust the top of the dough lightly with flour. Roll it out with a rolling pin into a paper thin sheet about 15x10 inches (I used only my hands). You may have to stop from time to time so that the gluten can relax. At these times, lift the dough from the counter and wave it a little and then lay it back down. When it is the desired thinness, let the dough relax for 5 mins.
Preheat the oven to 350 deg F with the oven rack in the middle shelf. Mist the top of the dough with water and sprinkle a covering of seeds (or) spices on the dough (such as alternating rows of sesame seeds, paprika, cumin seeds, carom seeds). Sprinkle kosher salt on top. Remember that, a little spices can go a long way! You could also precut the crackers using a pizza cutter and cut diamonds (or) rectangles in the dough. You do not need to separate the pieces, as they will snap apart after baking.
Bake for 15 to 20 mins, or until the crackers begin to brown evenly across the top. Repeat the same with the other half of the dough. When the crackers are baked, remove pan from the oven and let them cool in the pan for about 10 mins.
Snap them apart and serve with hummus / guacamole / any other dip!!

Note:
* Dry active yeast needs to be proofed first before mixing into the flour. Dissolve dry active yeast in 1/3 cup of warm water & honey and let it sit aside for 10 mins until all bubbly & foamy, which you can then add to the flour.
** For window-pane test: Refer here.
Sending this to ..
- Made with Love Mondays!
- Your Best Recipe!
